Raspberry Pi Setup Guide
Prerequisites
This tutorial requires the following hardware:
- A Raspberry Pi single board computer
- A microSD card
- An internet-connected computer
- A way to connect the microSD card to the computer (e.g., microSD slot or microSD reader)
Note
If you already have a 64-bit Linux distrubution installed on your Pi, you can skip ahead to installing viam-server. To check whether the Linux installation on your Raspberry Pi is 64-bit (required for running viam-server):
ssh into your Pi and then run lscpu.
Example output:
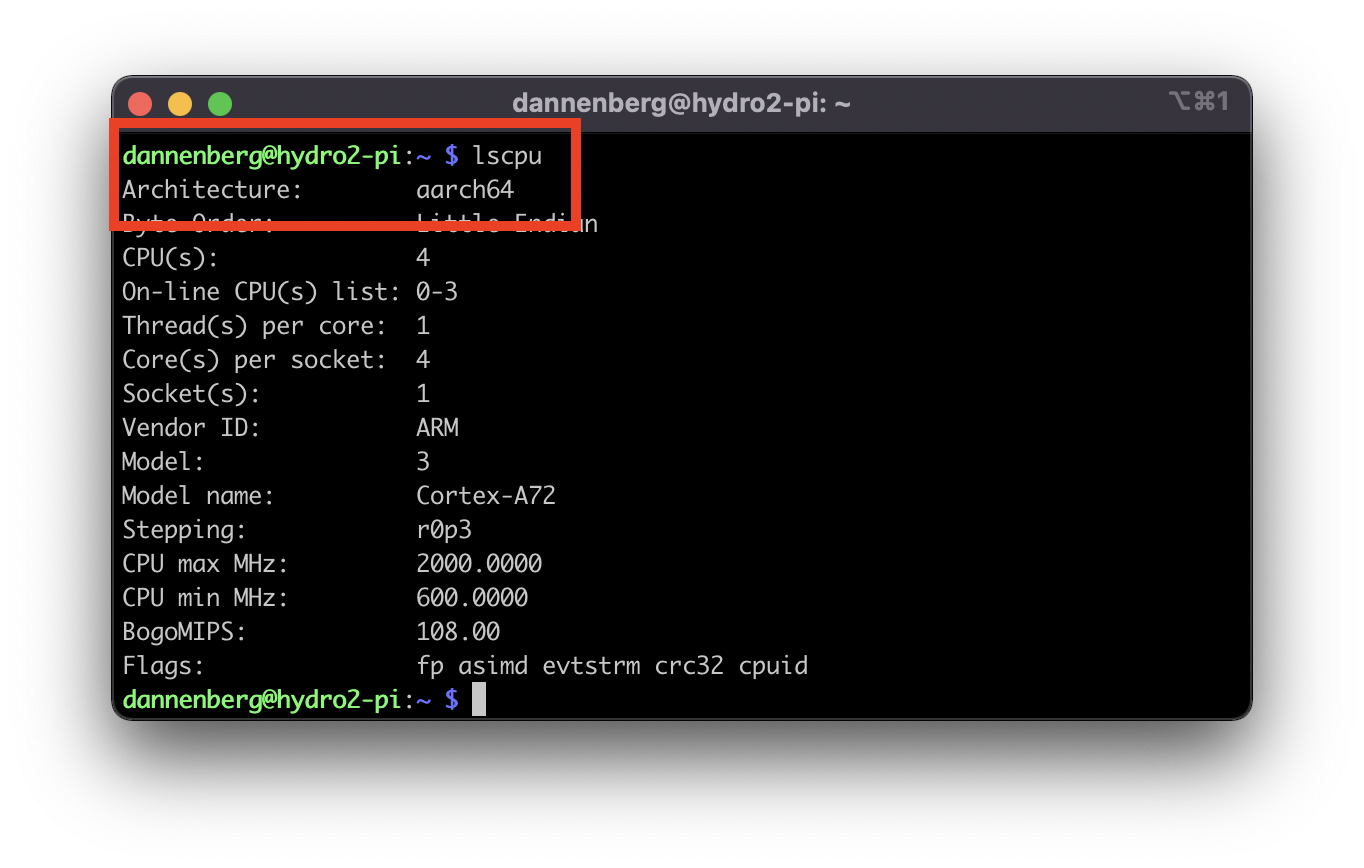
If the value of “Architecture: ‘xxxxxx’” ends in “64”, you can skip ahead to installing viam-server.
Installing Raspberry Pi OS
Before installing the Viam RDK, you will need a Raspberry Pi running a 64-bit Linux distribution. Here we will guide you through installing one called Raspberry Pi OS (formerly called Raspbian) on the microSD card from which the Pi boots.
Connect the microSD card to your computer.
You will be using the Raspberry Pi Imager to flash the microSD card.
Note
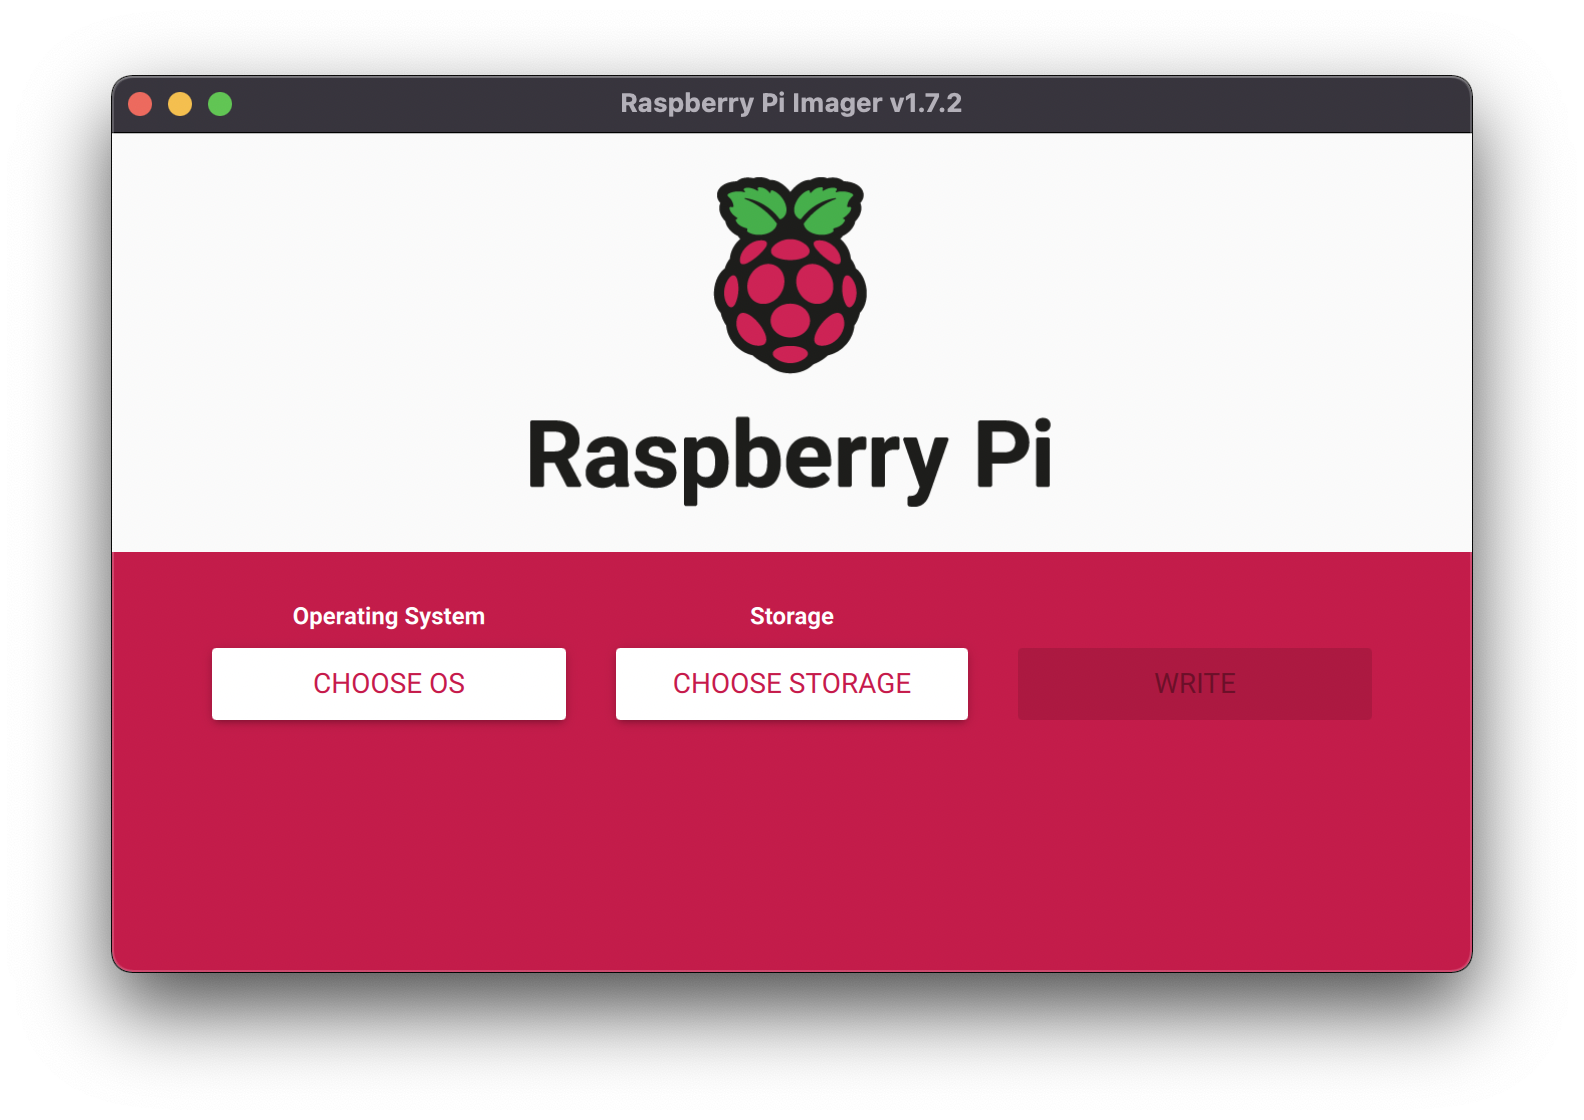
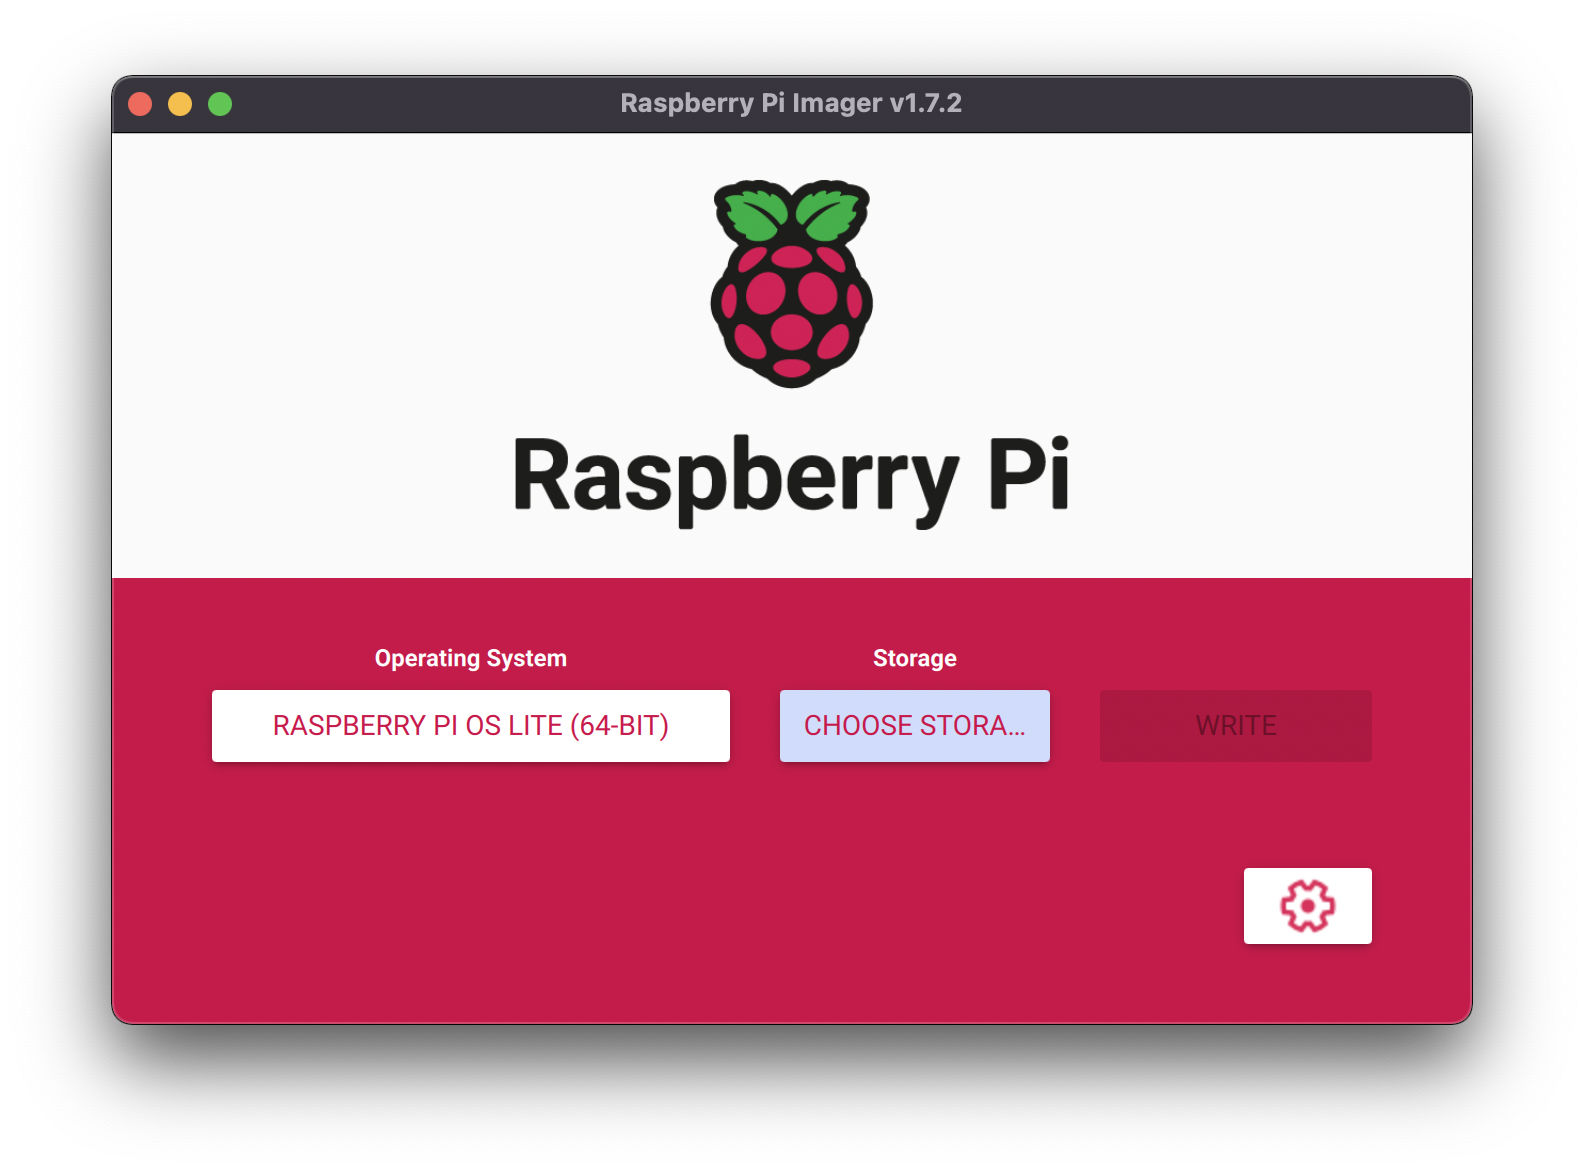
If you do not already have the Raspberry Pi Imager, you can download it and follow the installation instructions.After installing successfully, connect your microSD card to your computer and launch the Raspberry Pi Imager. You should be greeted with a window that looks like:
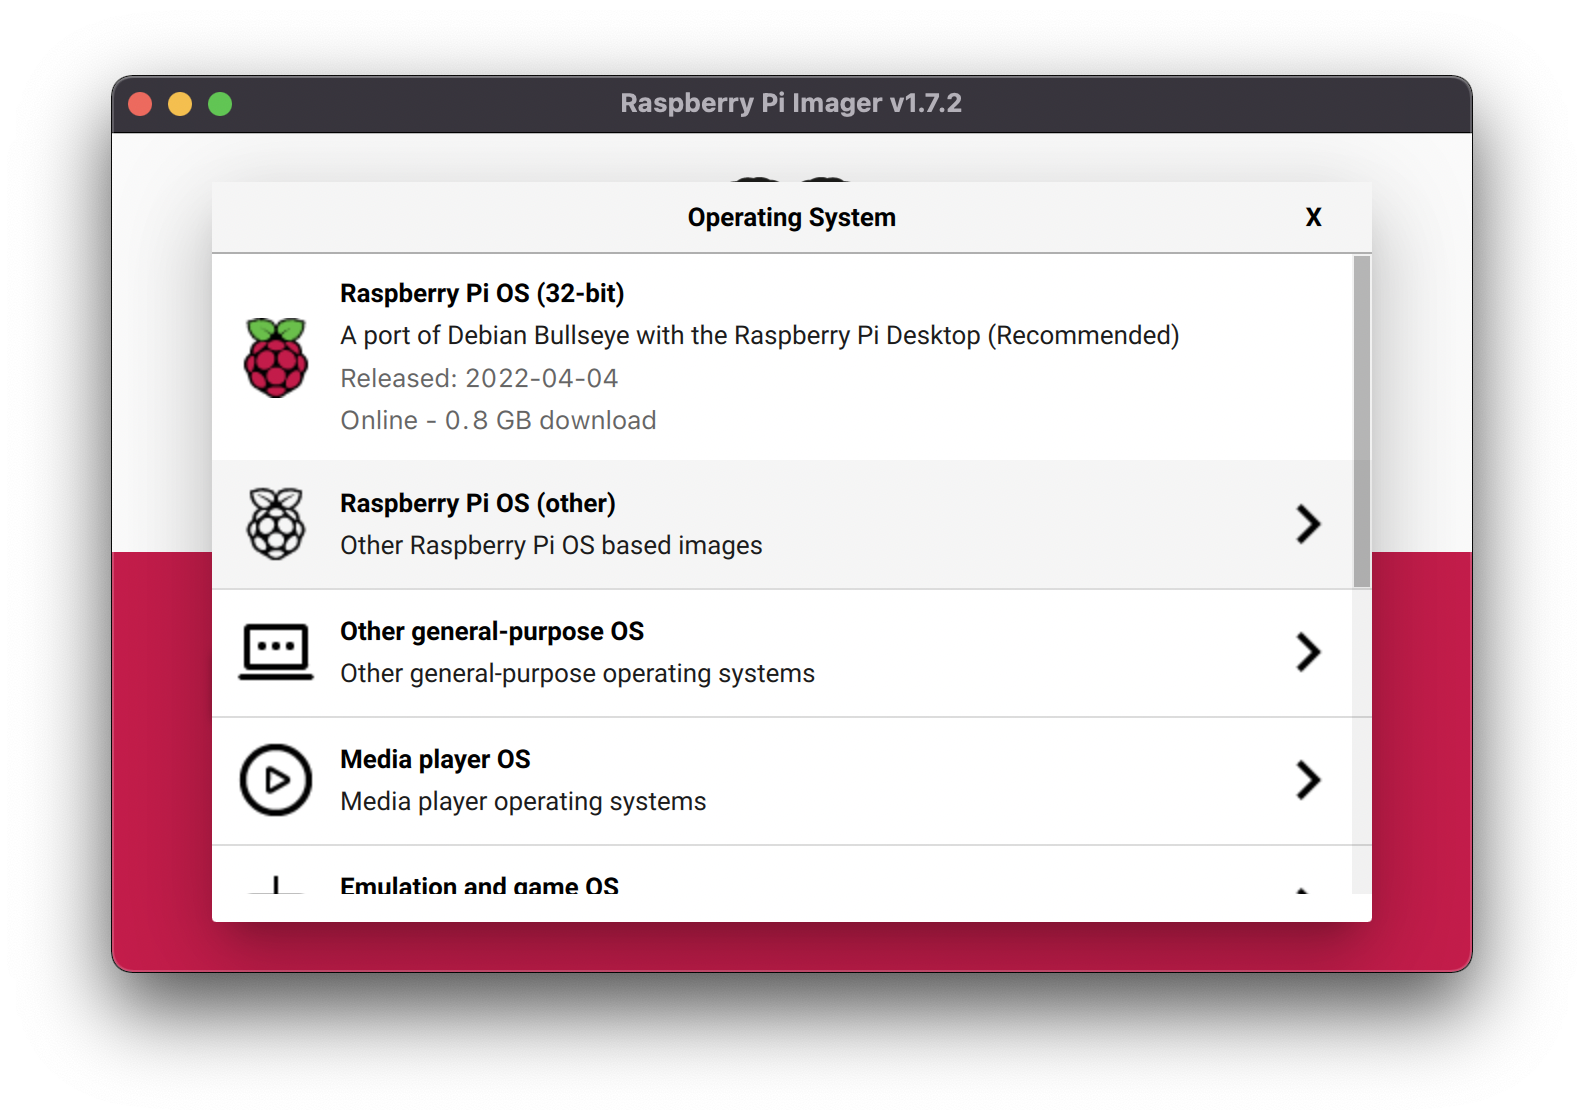
Select CHOOSE OS.
Since you need a 64-bit version of Linux, you will need to select it from the Rapsberry Pi OS (other) menu.
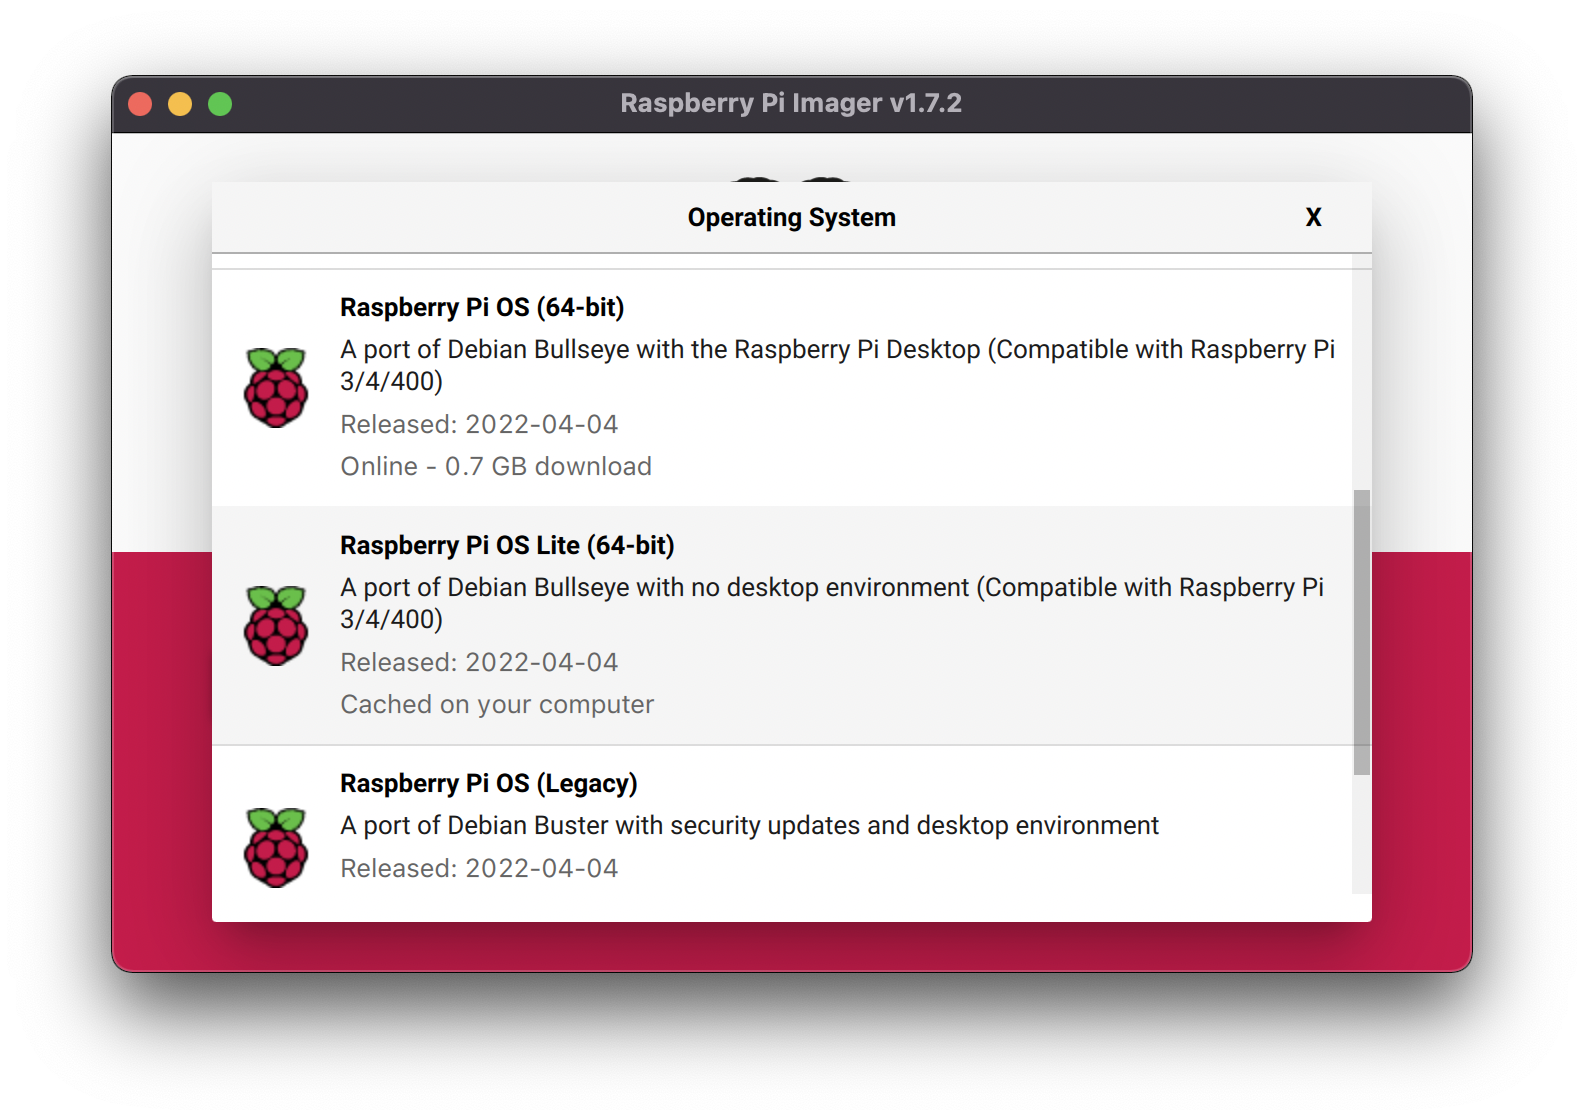
Then select the entry titled Raspberry Pi OS Lite (64-bit).
You should be brought back to the initial launch screen. To make your Raspberry Pi easier to access in the next step, it’s recommended that you configure your Raspberry Pi’s hostname, ssh credentials, and wifi now. Click the gear-shaped settings icon in the lower right to bring up the Advanced options menu.
Note
If you are using a non-Raspberry Pi OS, altering the Advanced options will cause the initial boot to fail.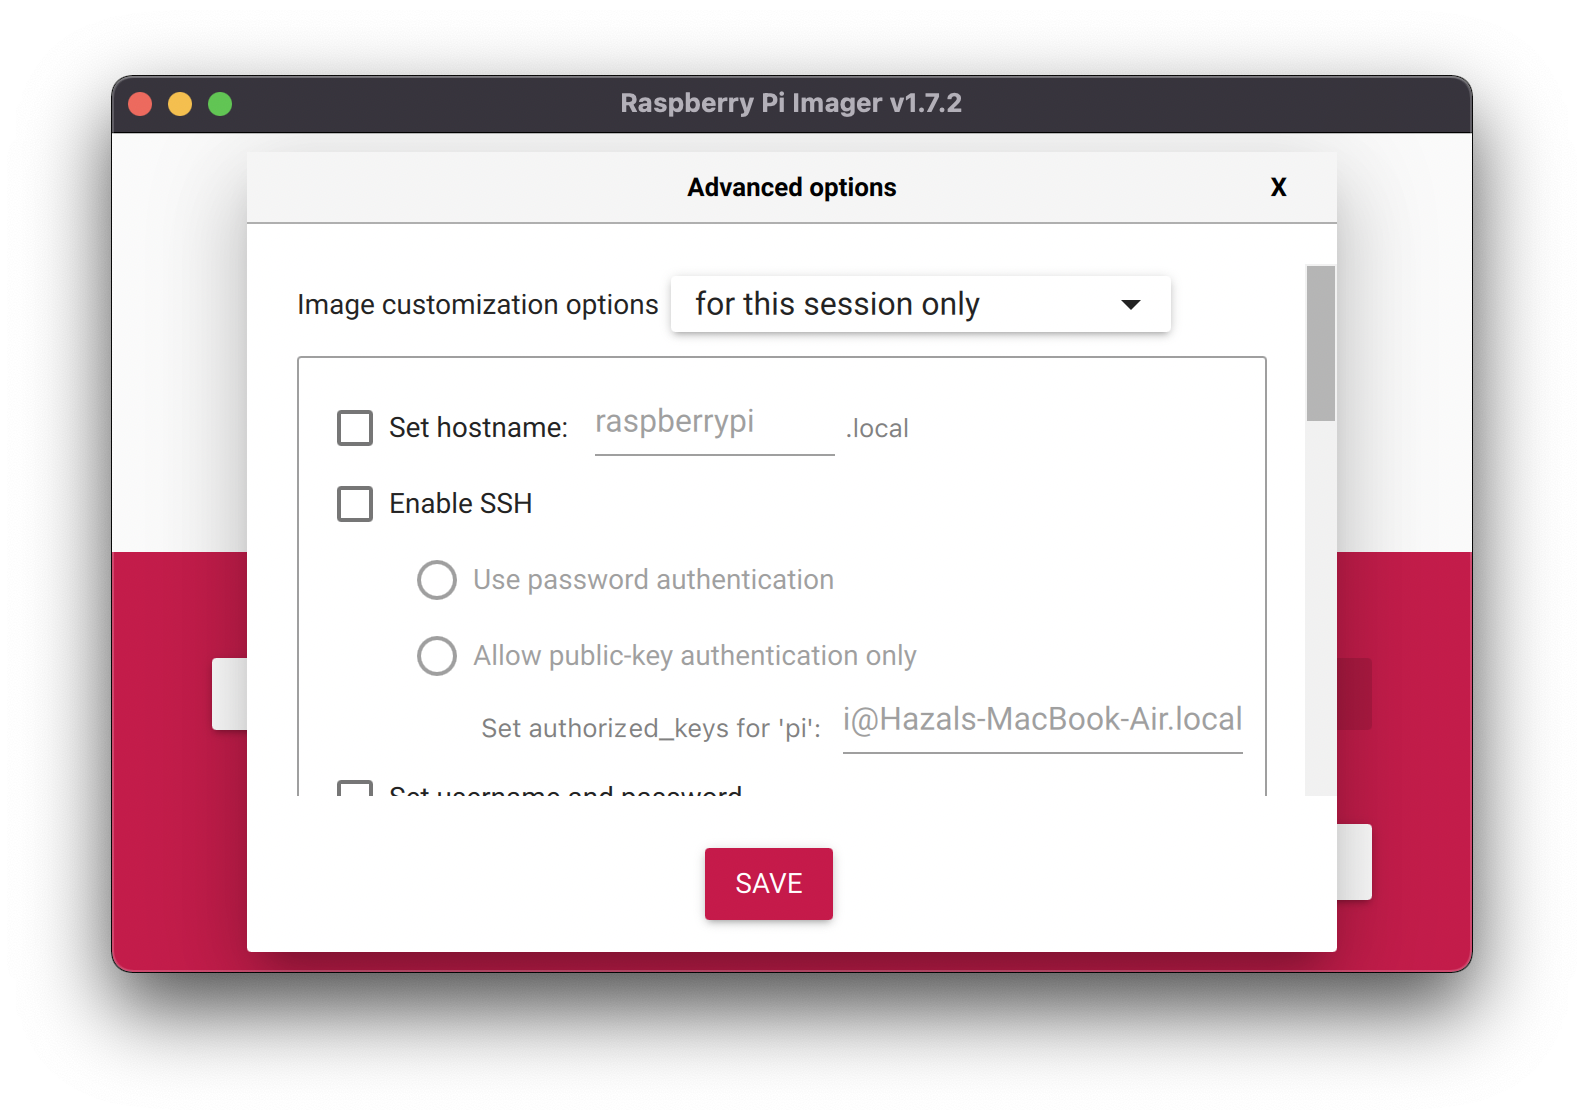
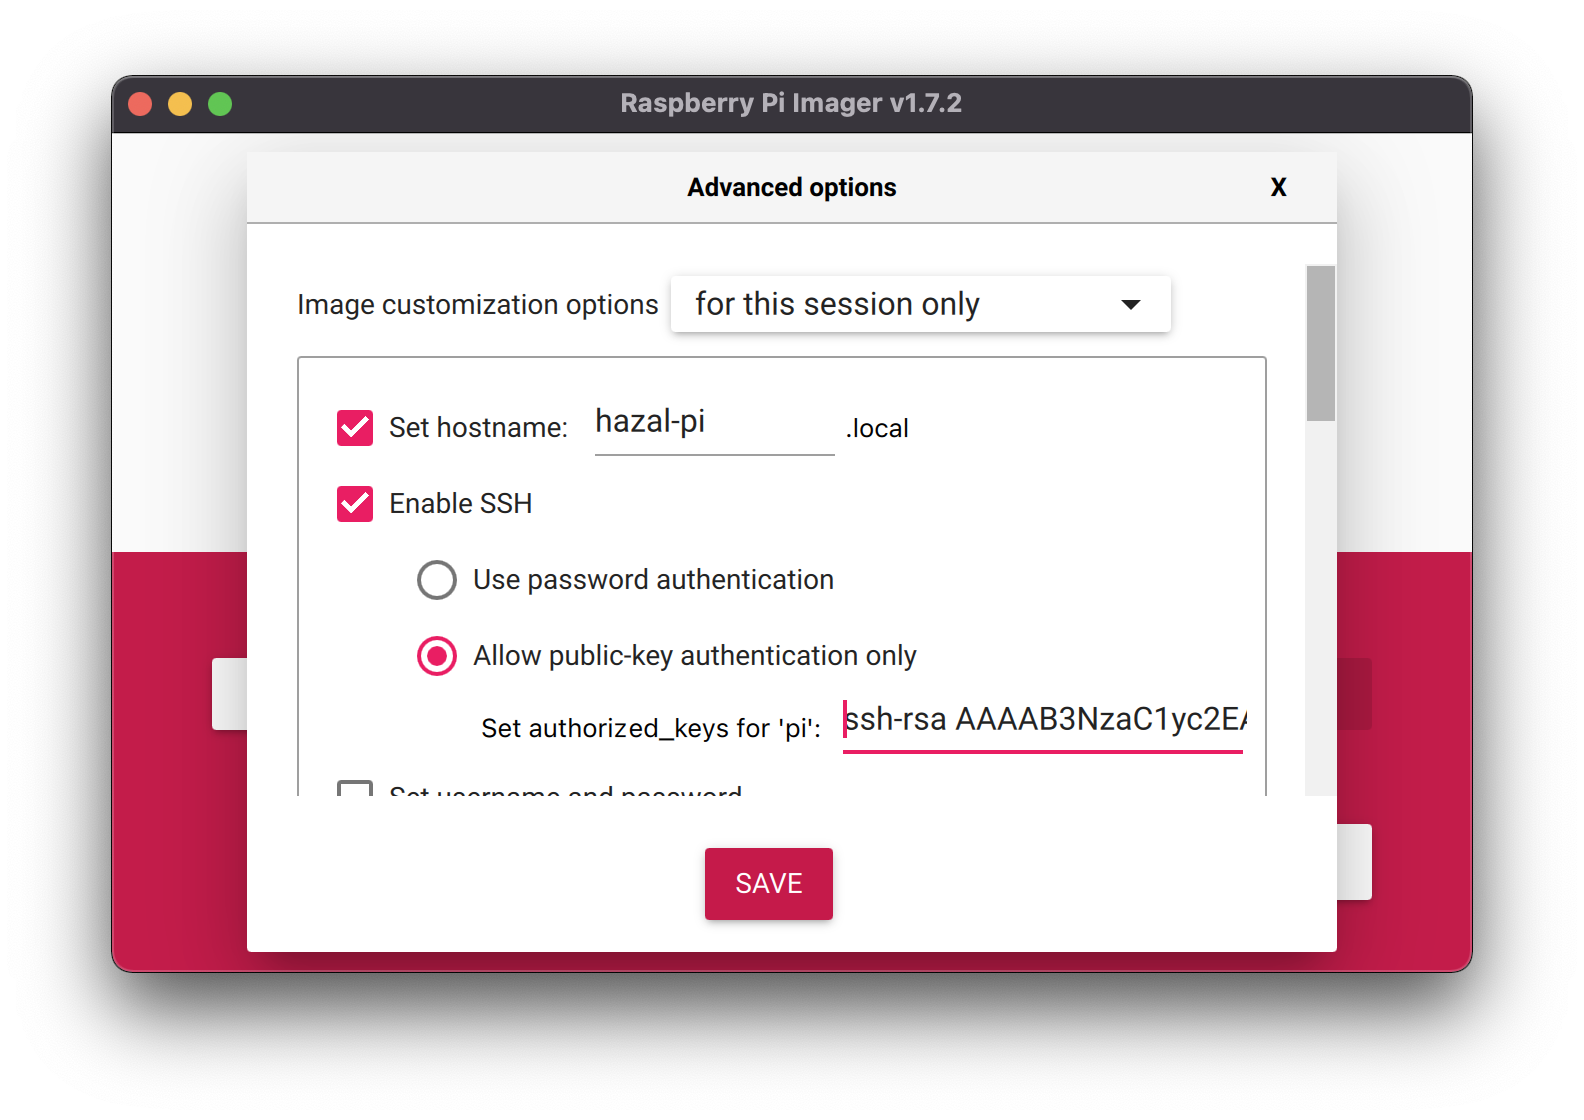
Check Set hostname and enter the name you would like to access the Pi by in that field.
There are two ways you can secure your Raspberry Pi: with an SSH key or with password authentication.
To use the SSH key method: check Enable SSH.
Using SSH Keys for authentication is a great way of securing your Raspberry Pi as only someone with the private SSH key will be able to authenticate to your system.
If you select Allow public-key authentication only, and the section set authorized_ keys for 'pi' is pre-populated, that means you do have an existing public SSH key that is ready to use.
In that case, you do not have to change this section.
If this section is empty, you can either generate a new SSH key using these instructions1, or you can use password authentication instead.
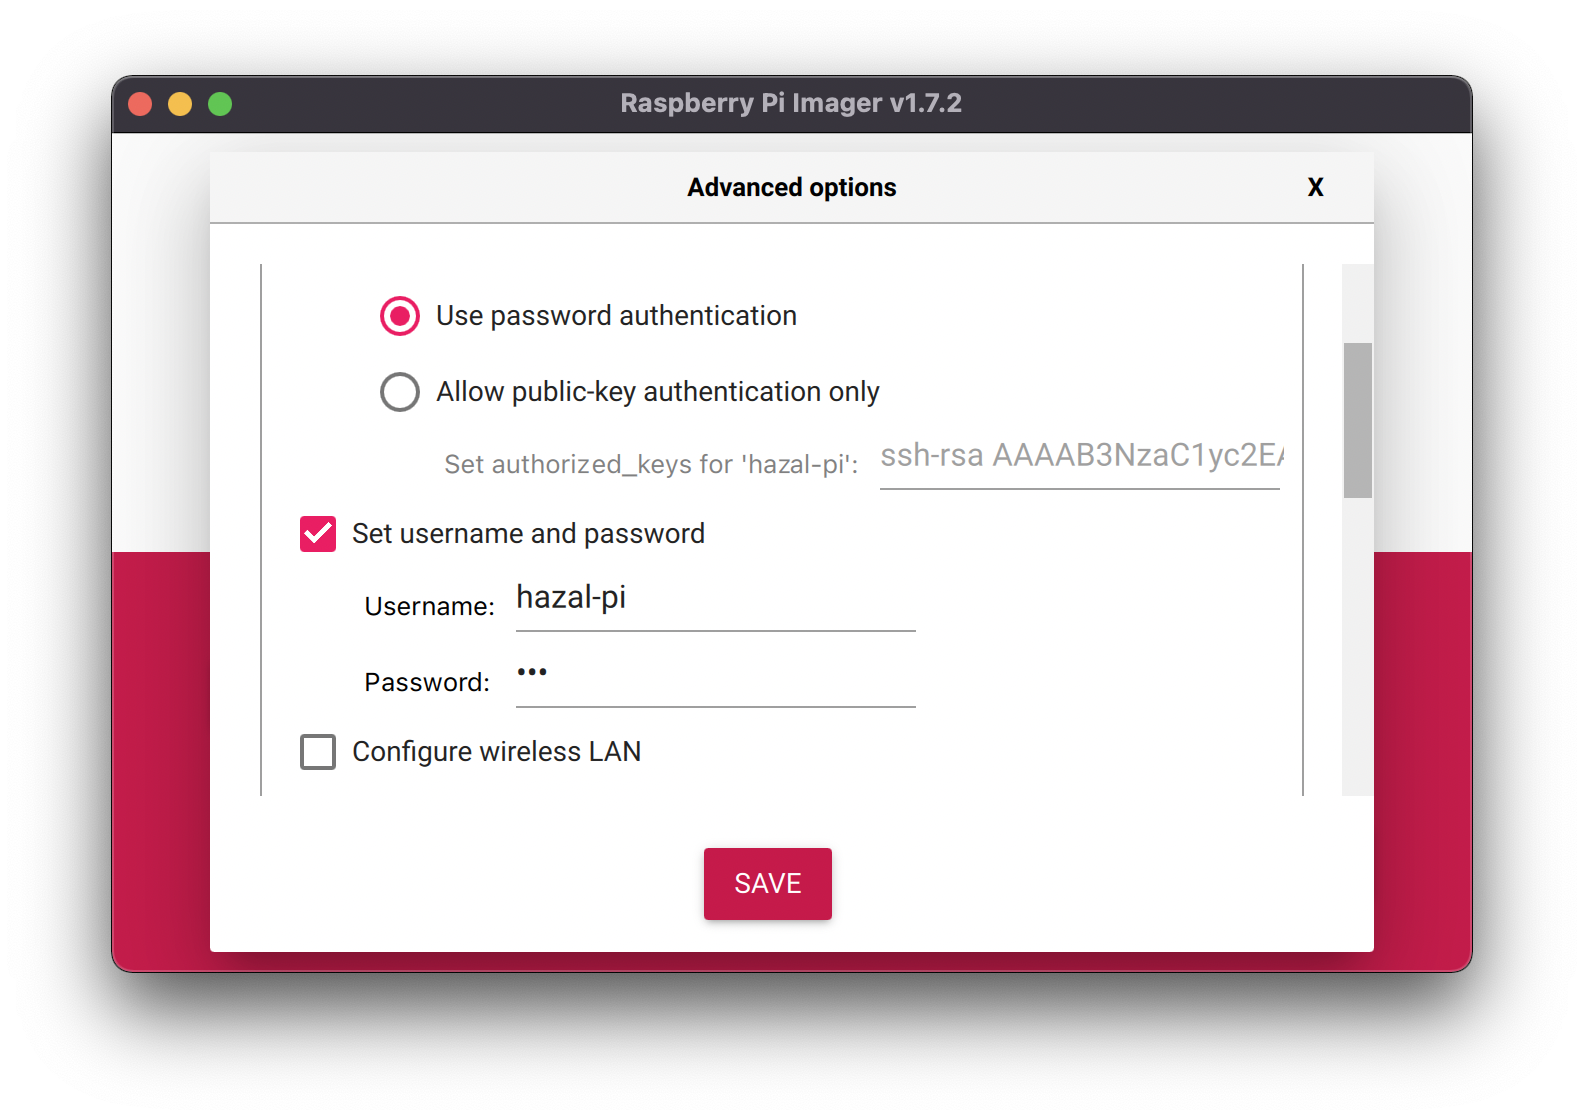
If you decide to use the password authentication method: click on Use password authentication.
If you scroll down, you have the option to change the username, then to set a password:
Tip
Be sure that you remember thehostname, username, and password you use, as you will need this when you SSH into your Pi.Caution
The default username and password on Raspberry Pis are
- username: pi
- password: raspberry
However, it’s bad practice to keep the default username and password on a Raspberry Pi since doing so makes it easy for hackers to get access to your Pi. In the past, malware infected thousands of Raspberry Pi devices that were using the default username and password.
Source: https://www.zdnet.com/article/linux-malware-enslaves-raspberry-pi-to-mine-cryptocurrency/
Lastly, you should connect your Pi to Wi-Fi, so that you can run viam-server wirelessly.
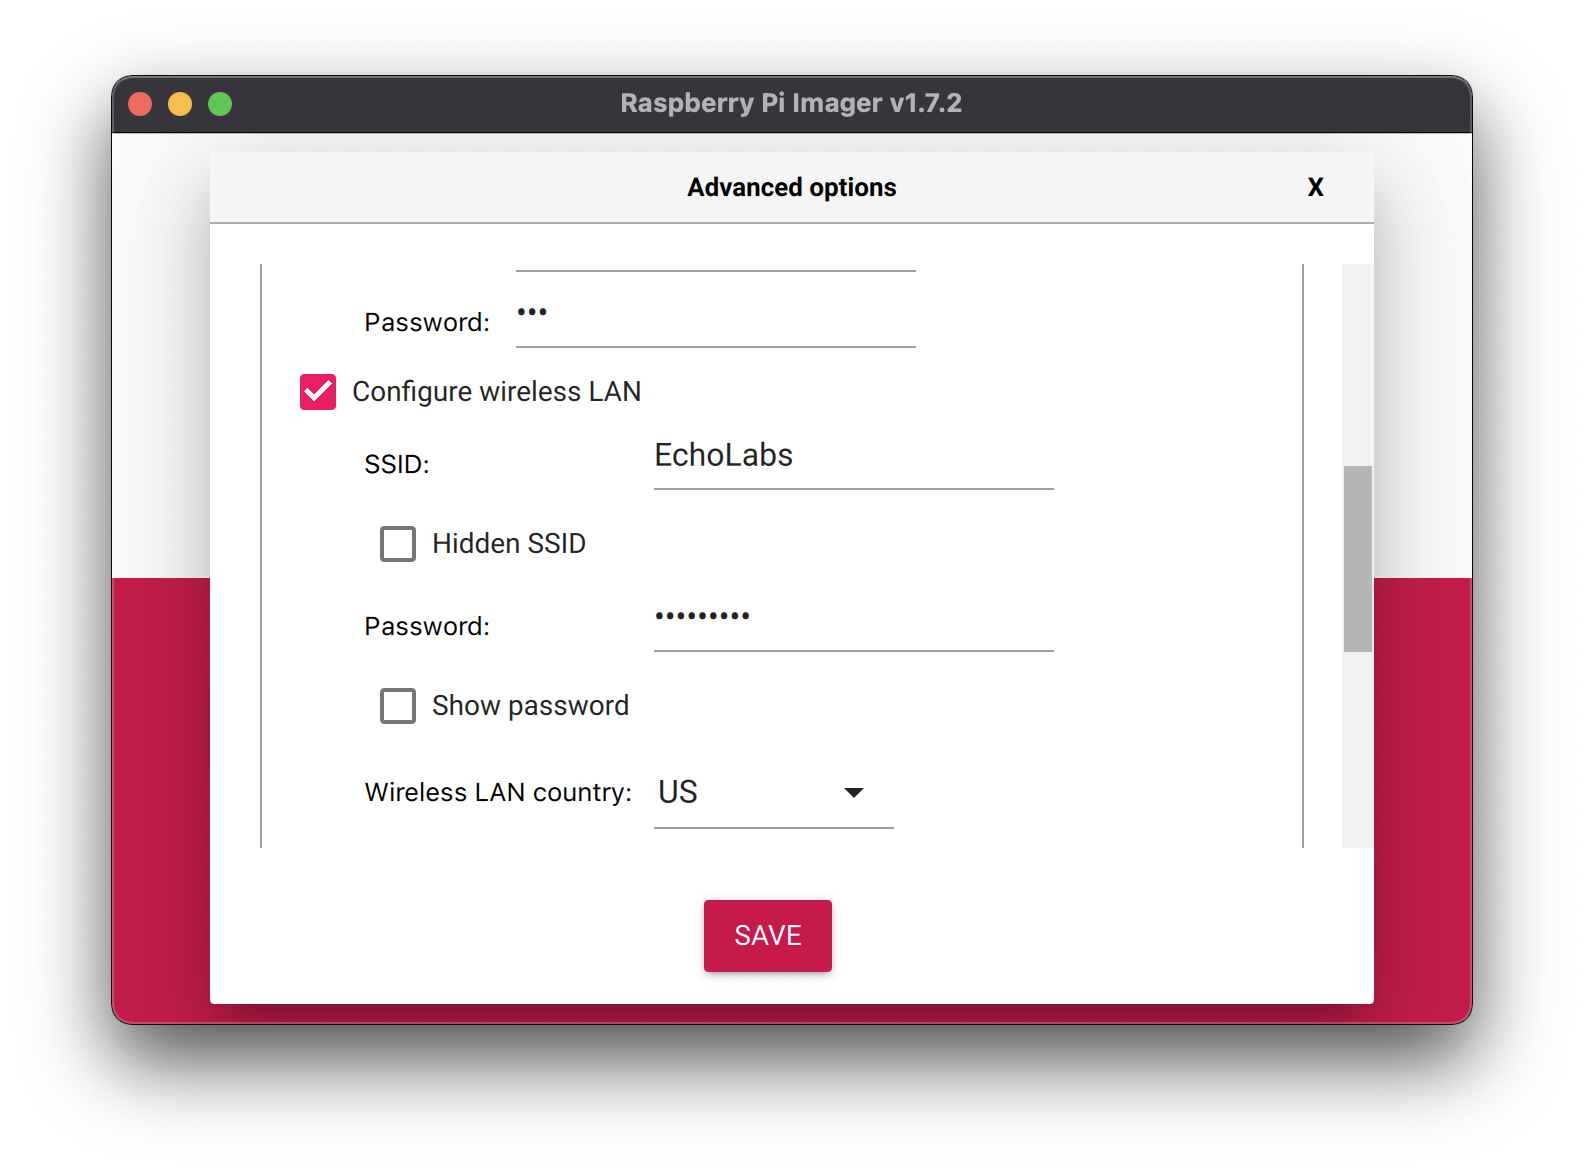
Check Configure wireless LAN and enter your wireless network credentials.
SSID (short for Service Set Identifier) is your Wi-Fi network name, and password is the network password.
Change the section Wireless LAN country to where your router is currently being operated and then hit save:
This should return you to the initial screen.
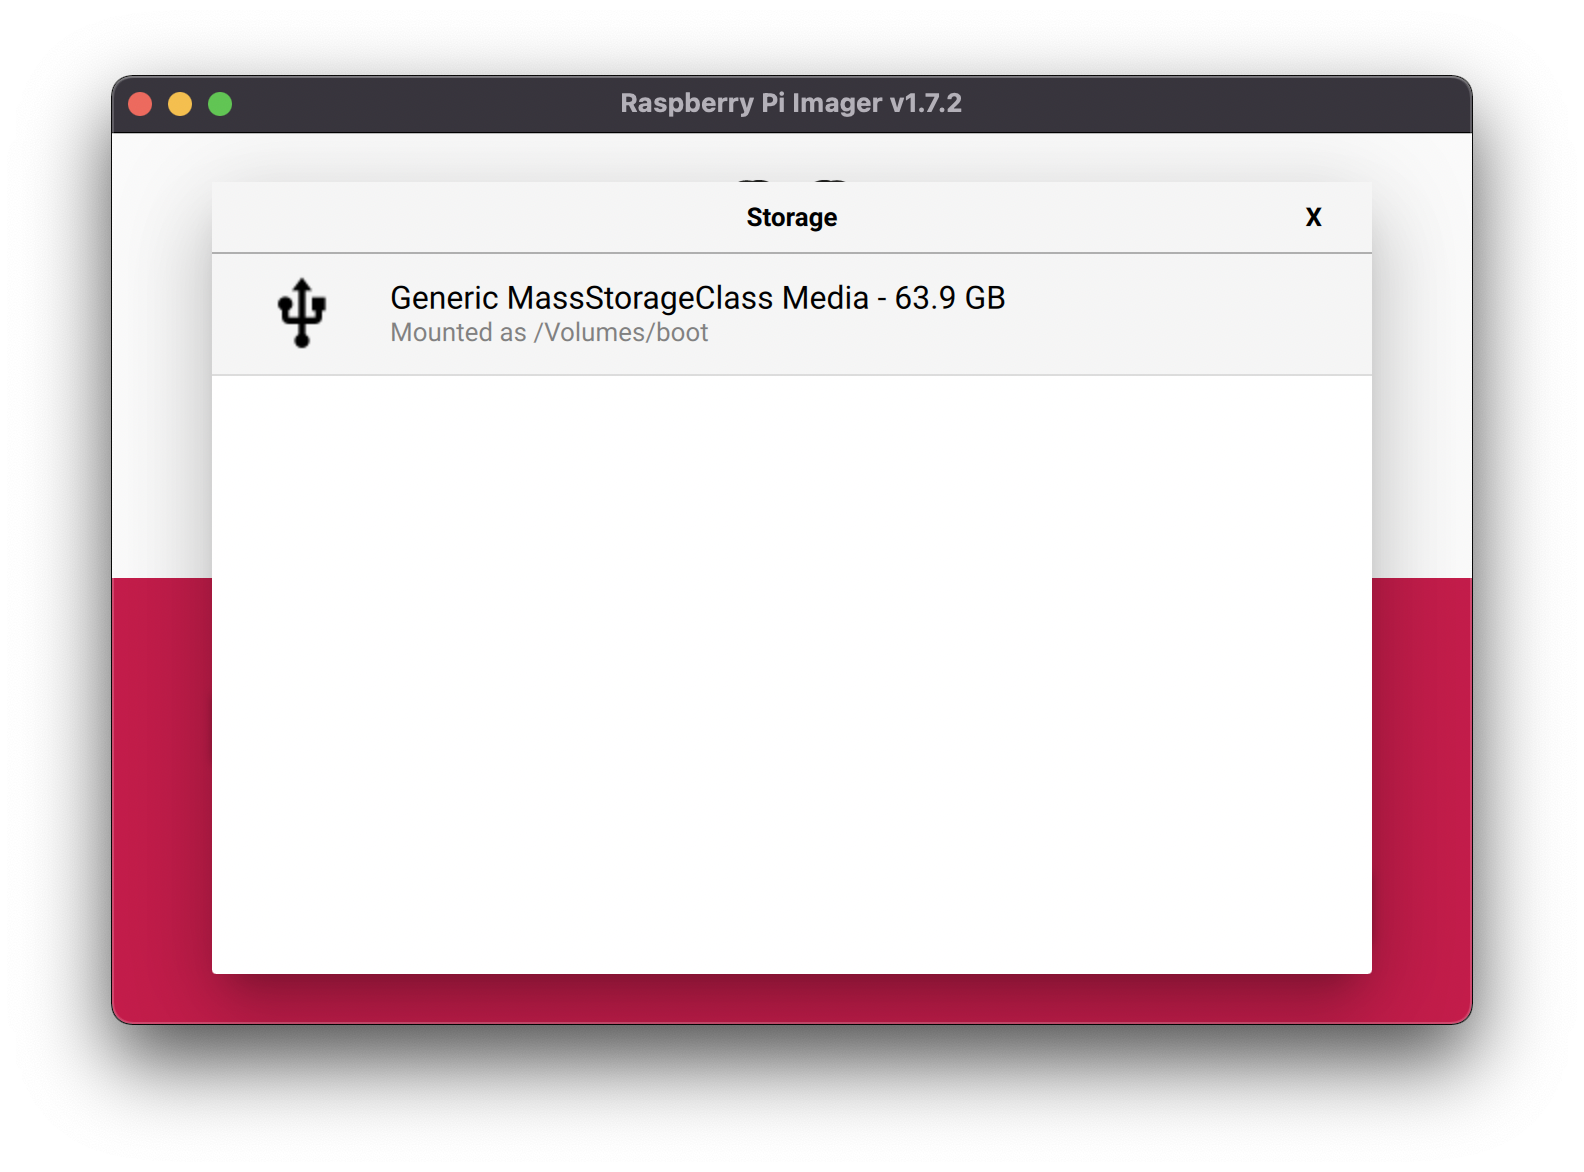
Now you need to pick your storage medium, so click CHOOSE STORAGE:
You may have many devices listed, select the microSD card you intend to use in your Raspberry Pi. If this page is blank and you do not have any listed, make sure your microSD card is connected to your computer correctly:
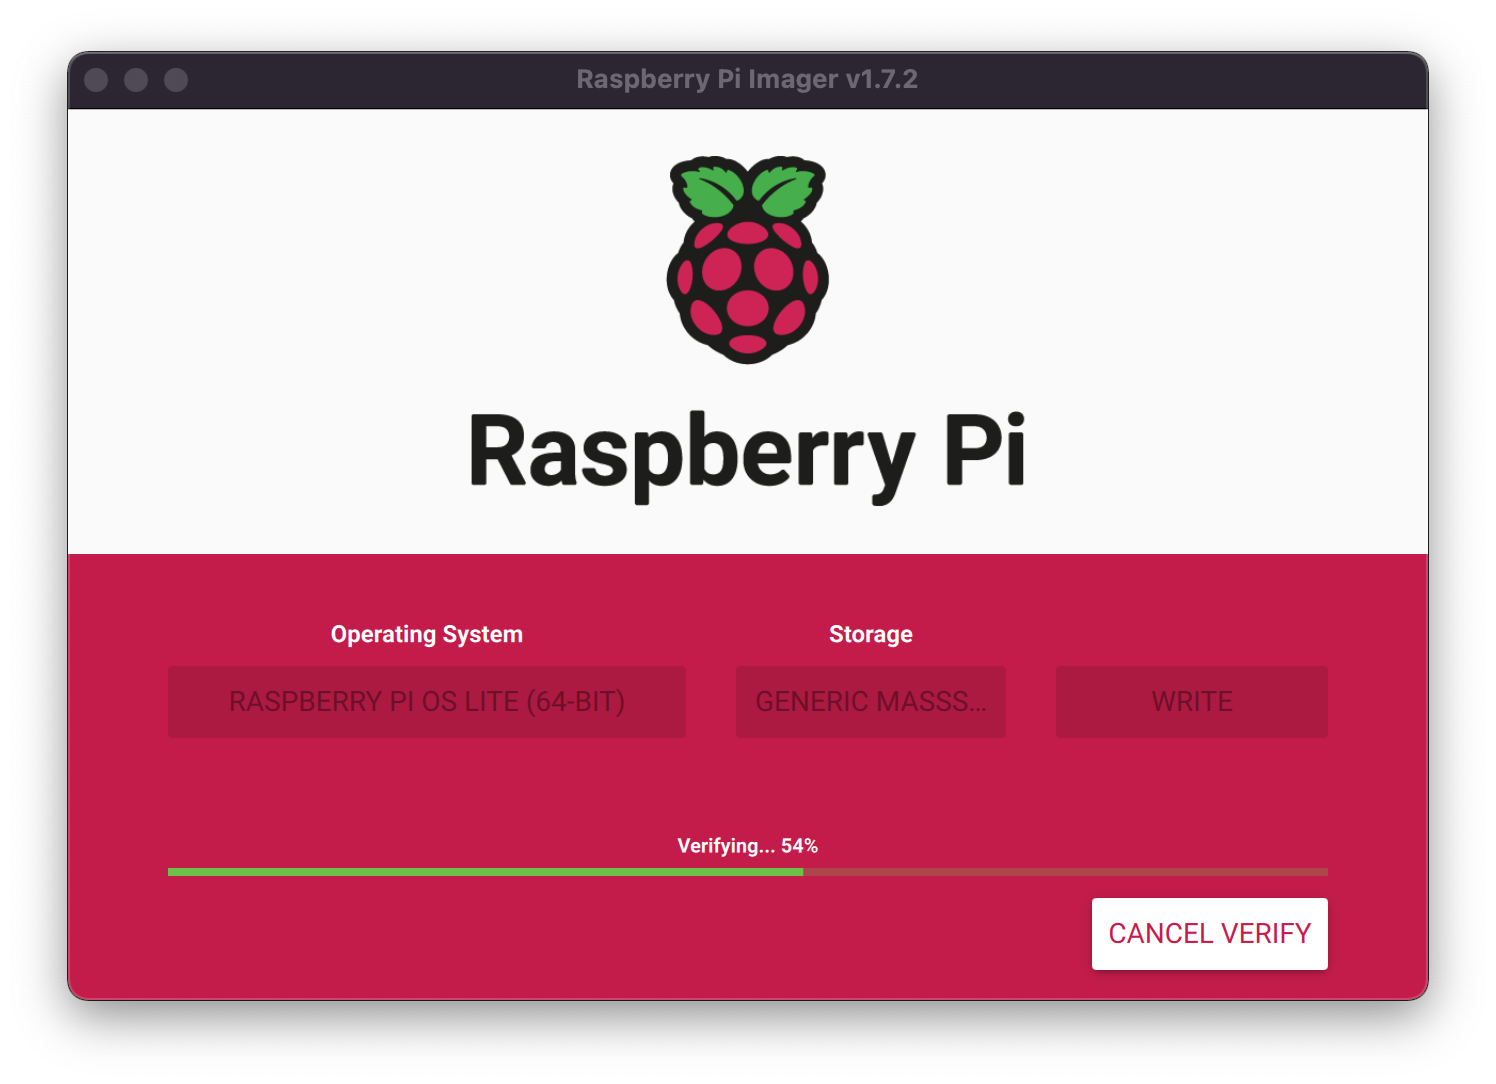
After clicking save, double check your OS and Storage settings and then click WRITE:
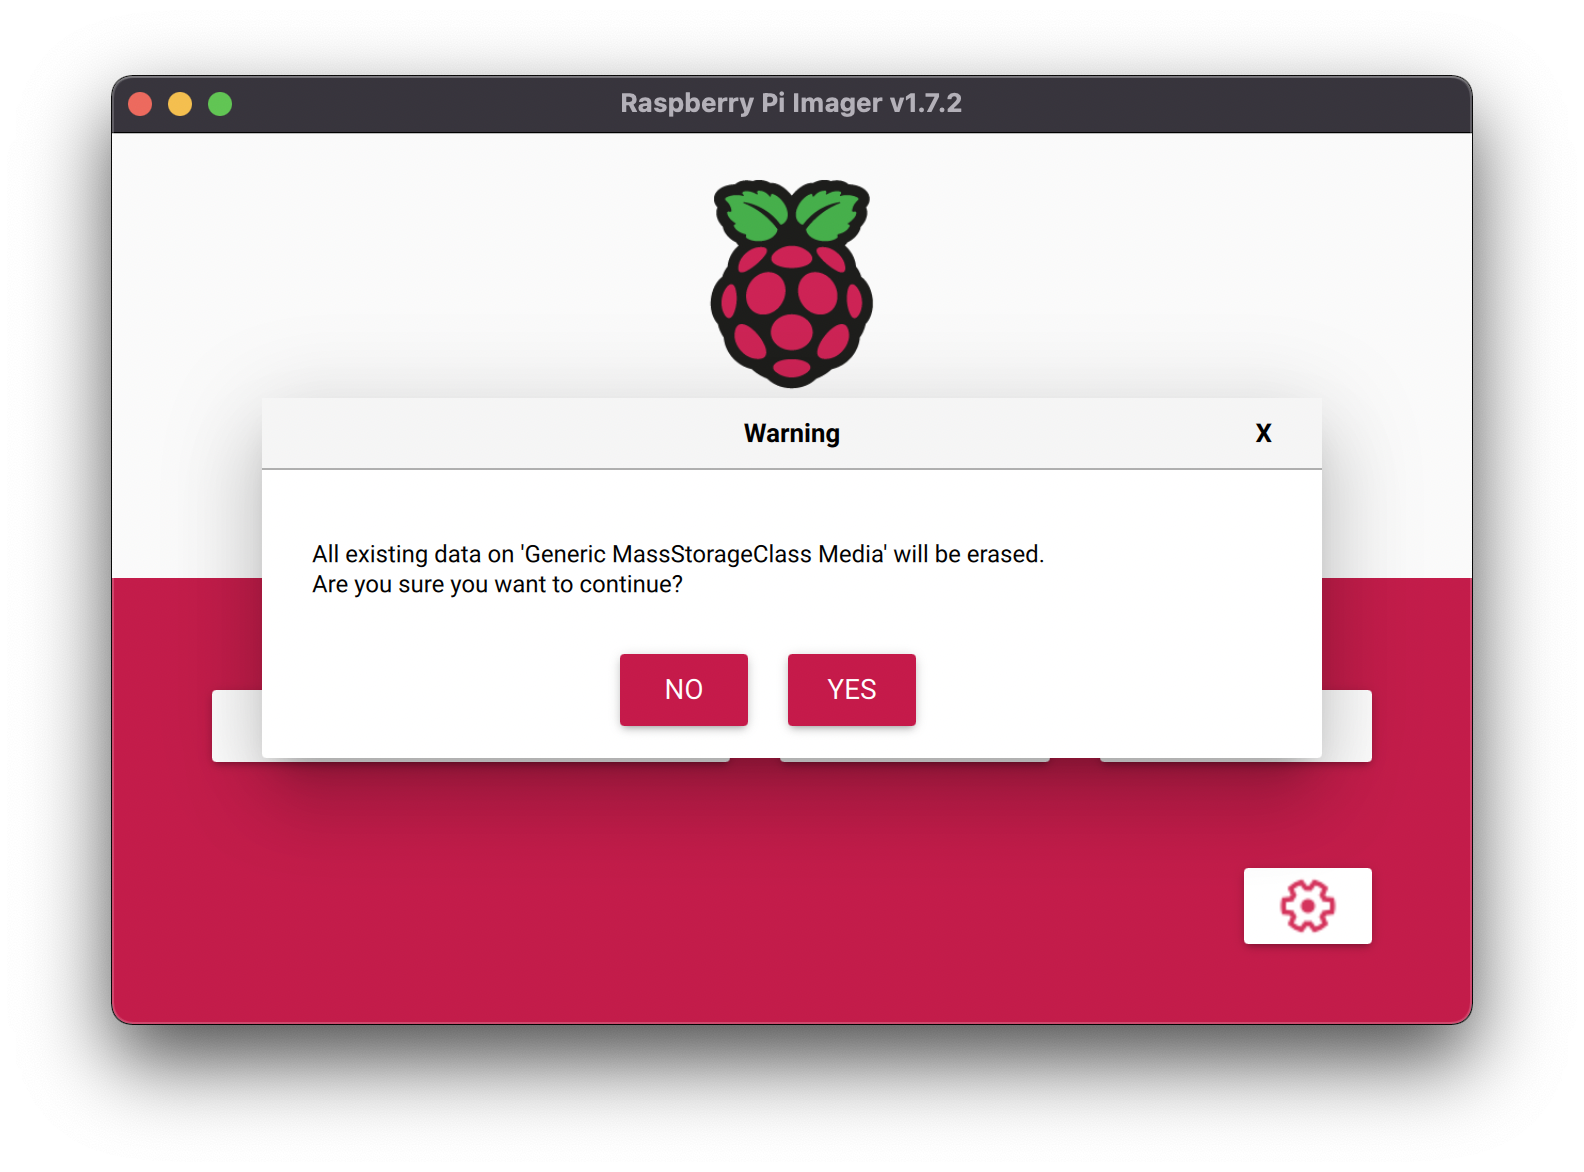
You will be prompted to confirm erasing your microSD card: select YES.
You may also be prompted by your operating system to enter an Administrator password:
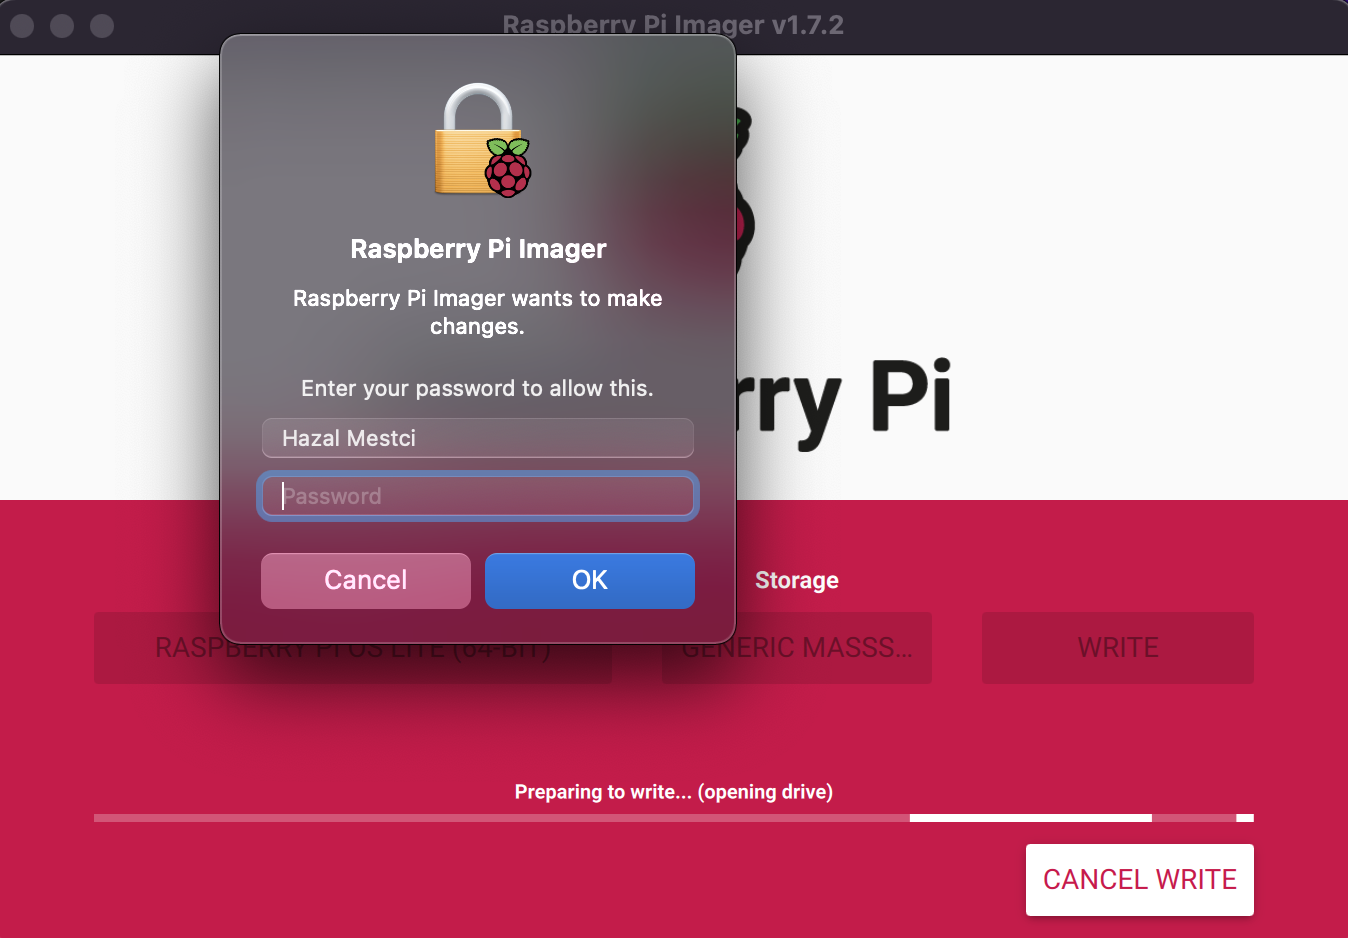
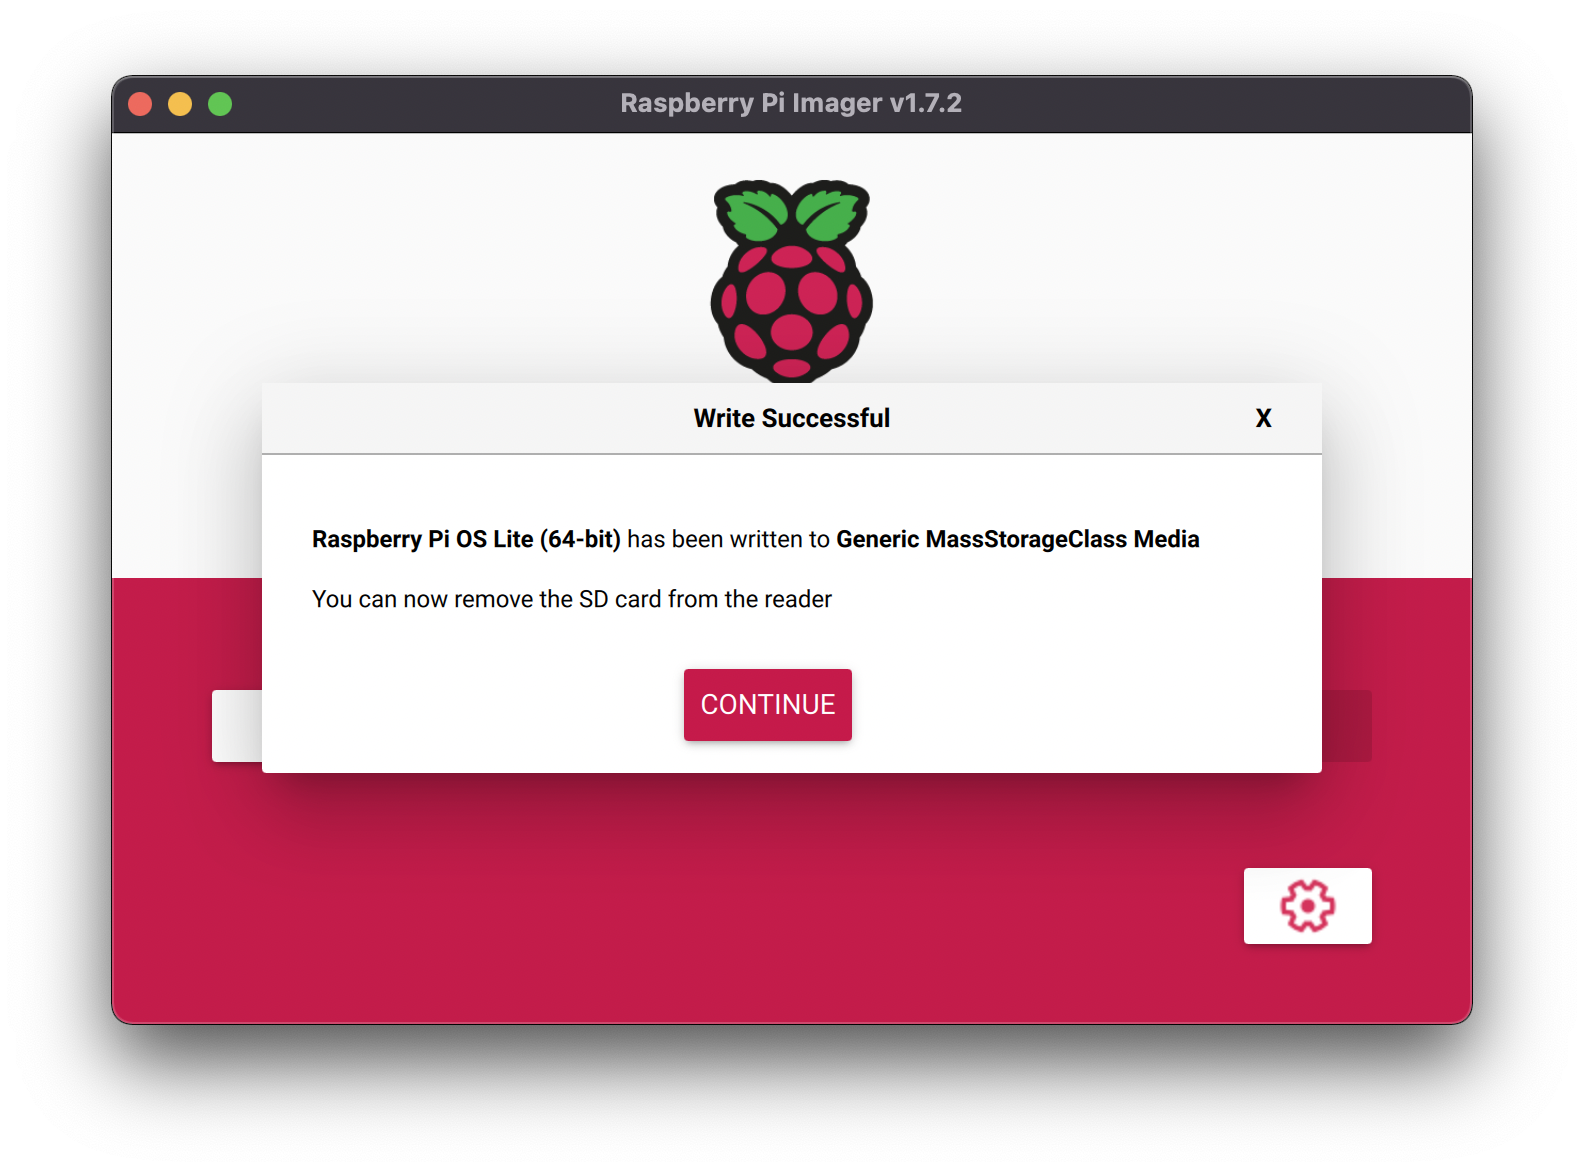
After granting permissions to the Imager, it will begin writing and then verifying the Linux installation to the MicroSD card:
Remove the microSD card from your computer when it is complete:
Place the SD card into your Raspberry Pi and boot the Pi by plugging it in to an outlet. A red LED will turn on to indicate that the Pi is connected to power.
Connecting to your Pi with SSH
Once your Raspberry Pi is plugged in and turned on, wait a minute to let your Pi boot up.
Launch your terminal on your computer and run this command:
Tip
The text in <> should be replaced (including the < and > symbols themselves) with the user and host names you configured when you set up your Pi.
Example: if your username is ‘USERNAME’ and your hostname is ‘pi’: then it should be ssh USERNAME@pi.local
ssh <USERNAME>@<HOSTNAME>.local
If you are prompted “Are you sure you want to continue connecting?”, type “yes” and hit enter. Then, enter your password. You should be greeted by a login message and a command prompt.
Next, it’s good practice to update your Raspberry Pi to ensure all the latest packages are installed:
sudo apt update
sudo apt upgrade
Enabling Specific Communication Protocols on the Raspberry Pi
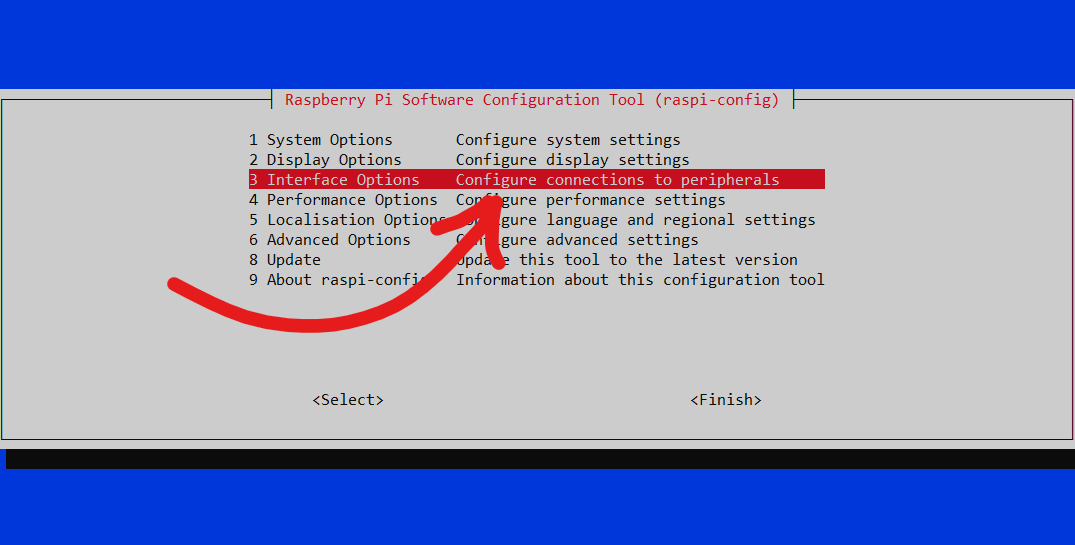
If you are using hardware that requires I2C, SPI, Serial, or one-wire protocols to communicate with your Pi, you will need to enable them via raspi-config.
Launch the config tool by running the following command:
sudo raspi-config
Use your keyboard to select “Interface Options” and enable the relevant protocols.
For these changes to take effect, you need to restart your Raspberry Pi if it hasn’t already prompted you to do so.
sudo reboot
Adding your Pi on the Viam app
In your web browser, navigate to the Viam app (https://app.viam.com) and log in.
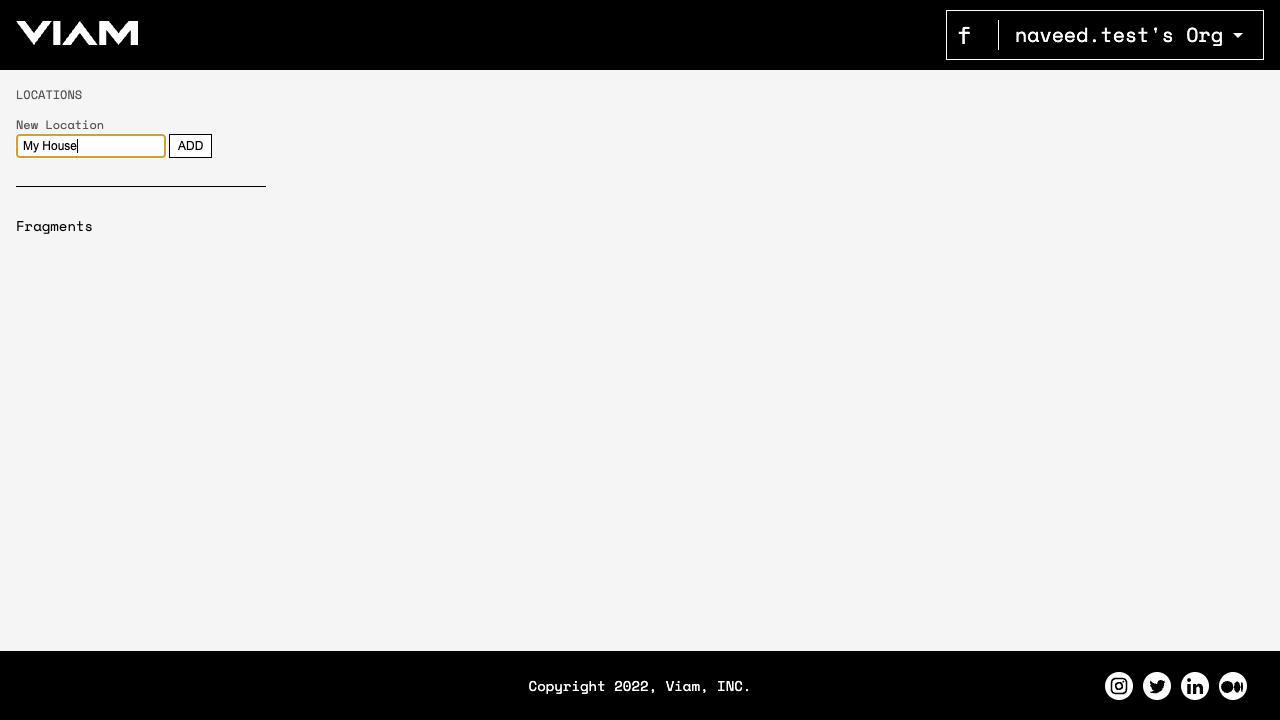
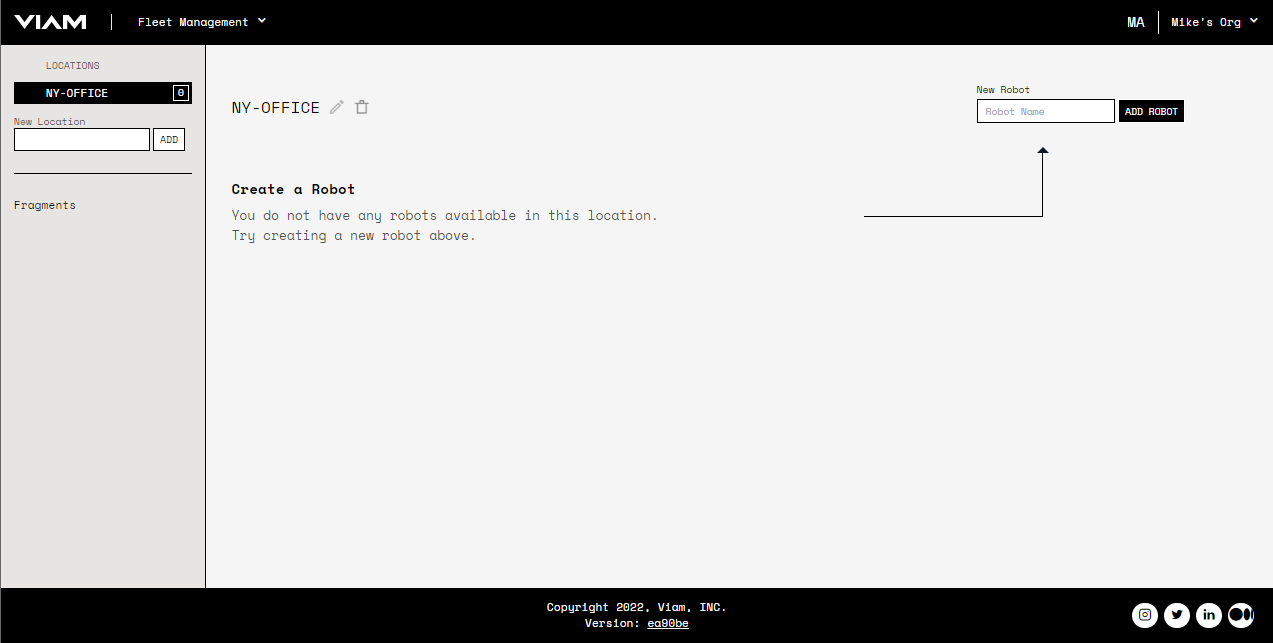
Once you are logged in, a location will be created for you by default, or you can create a new location by filling out the field on the left and then clicking ADD. Location are just a way of organizing robots. You can find more information on managing robot fleets here.
Select your location and use the form on the right to create a new Robot. If this is the first robot in this location, the app displays an arrow pointer to the New Robot field (upper RH-corner). Enter a name for your robot, then click Add Robot:
Navigate to your new robot, which should show the SETUP tab as shown below:

Follow the steps on the setup tab
Follow the steps on the SETUP tab to install viam-server on your Raspberry Pi, making sure that Linux mode and Aarch64 architecture are selected in the upper left corner of the tab.
Once you have installed viam-server on your Pi, refresh the page on the Viam app (https://app.viam.com) to confirm your Pi has successfully connected and pulled the config by looking at the top of the Robot page and seeing that host and ips fields are populated and that the last online field reads live.
You should also see the the notification on the setup page that says “Your robot is connected!”

Next Steps
Now that you have the viam-server up and running, you can start configuring your robot and the real fun can begin!
Check out our list of tutorials for step-by-step project walkthroughs demonstrating robot configuration and using Viam’s Python SDK and Golang SDks.
If you already have a project in mind, head to your newly connected robot’s CONFIG tab. Here you can describe the hardware attached to your Pi which will allow Viam to actuate the hardware and expose APIs for it.
Click on NEW COMPONENT and then populate the resulting component with the configuration information for your hardware.
Find information on how to configure specific component types in their respective component and service docs.
Once your configuration changes are saved, you can switch to the CONTROL tab to actuate your hardware using buttons in the app.