How to Build a Line Follower with a Rover and a Webcam
Many line-following robots rely on a dedicated array of infrared sensors to follow a dark line on a light background or a light line on a dark background. This tutorial uses a standard webcam in place of these sensors, and allows a robot to follow a line of any color that is at least somewhat different from the background.
Goal: To make a wheeled robot follow a colored line along the floor using a webcam and the Viam vision service color detector.

What you will learn:
- How to use the Viam vision service including color detectors
- How to use the Viam Python SDK1, including:
- How to establish communication between the code you write and your robot
- How to send commands to components of your robot
What you’ll need
- A single board computer running an instance of viam-server
- This tutorial assumes the use of a Raspberry Pi running a 64-bit Linux distribution, but these instructions could potentially be adapted for other boards.
- A wheeled base component
- We used a SCUTTLE Robot3 for this project, but any number of other wheeled bases could work, as long as they can carry the compute module and camera, and can turn in place.
- RGB camera
- A common off-the-shelf webcam (such as this) connected to the Pi’s USB port, or something like an ArduCam with a ribbon connector to the Pi’s camera module port.
- You must mount the camera to the front of the rover pointing down towards the floor.
- Colored tape and floor space
- Any color is suitable as long as its color is somewhat different from the floor color. For our tutorial, we used green electrical tape.
- Non-shiny floors tend to work best.
Figure 1: A SCUTTLE robot base with a camera mounted on the front, pointing mostly down and slightly forwards.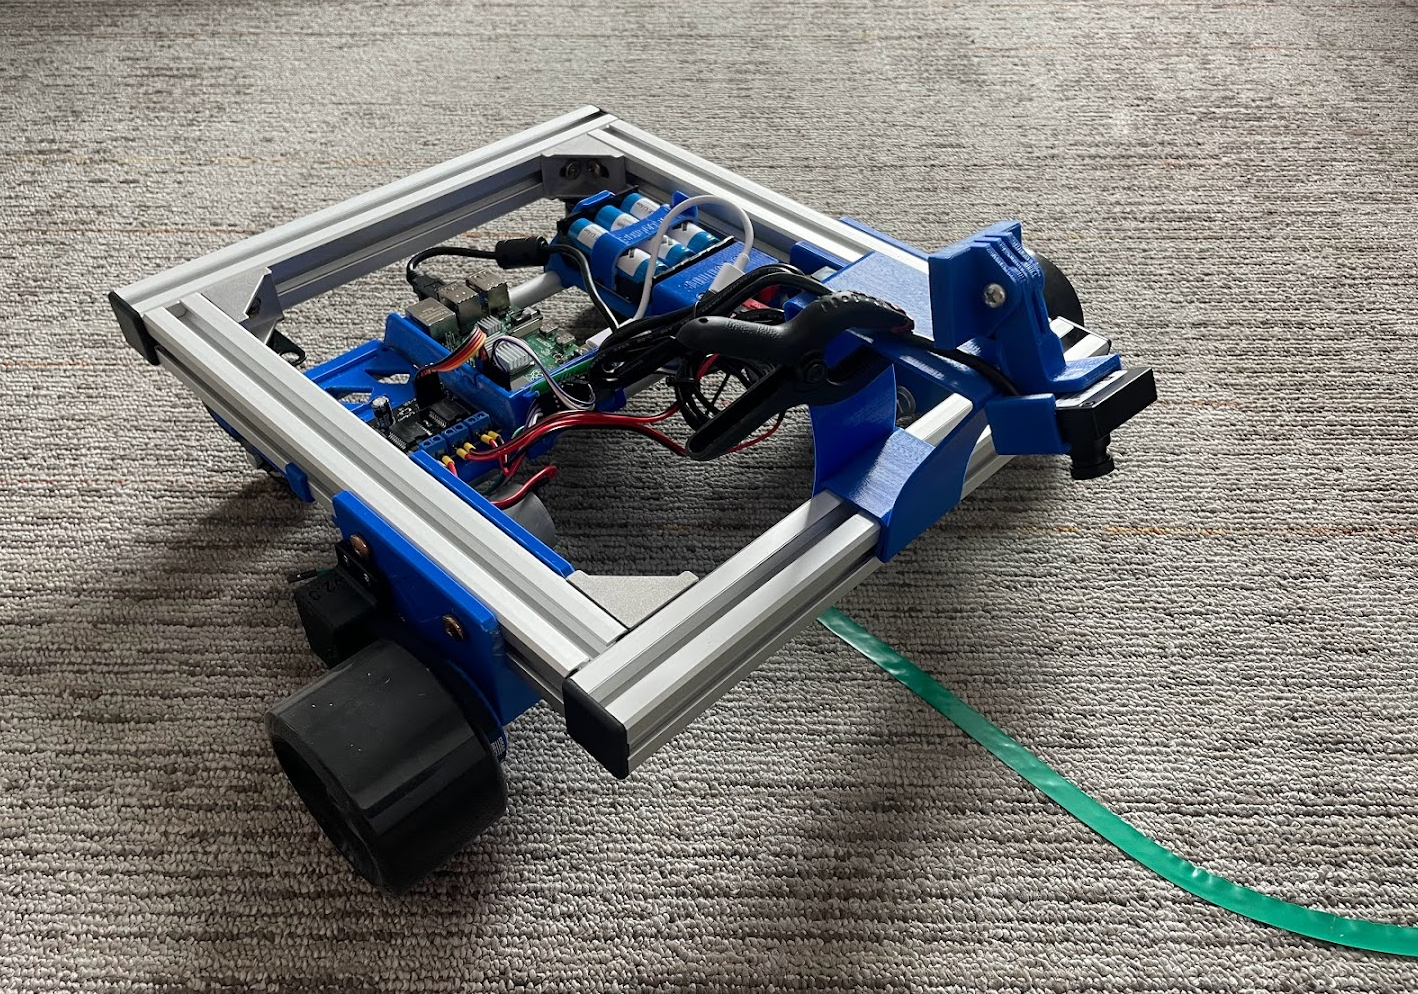
Configuration using Viam
If you haven’t already, please set up the Raspberry Pi per these instructions.
Configuring the hardware components
Configure the board per the Board Component topic.
We named ours local.
Use type board and model pi if you’re using a Raspberry Pi.
Configure the wheeled base per the Base Component topic.
We named ours scuttlebase.
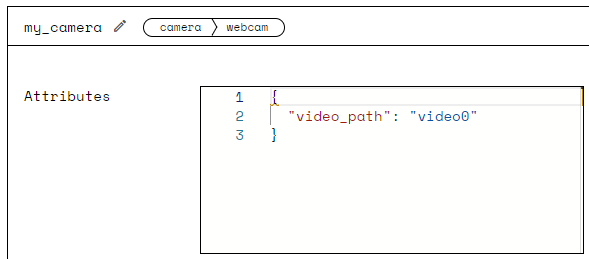
Configure the camera as described in this tutorial: Connect and configure a webcam.
Your webcam configuration in the Config Builder will look something like this:
Or if you prefer the raw JSON:
    {
      "name": "my_camera",
      "type": "camera",
      "model": "webcam",
      "attributes": {
        "video_path": "video0"
      },
      "depends_on": []
    }
Configuring the vision service
We’ll use the Viam vision service color detector to identify the line to follow.
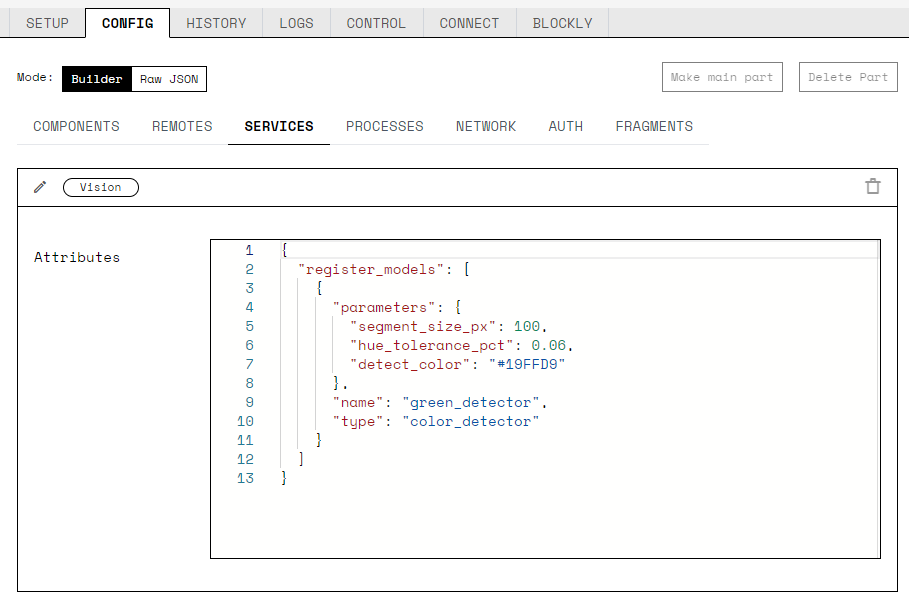
In the SERVICES section of the CONFIG tab, configure a color detector for the color of your tape line.
- Use a color picker like colorpicker.me4 to approximate the color of your line and get the corresponding hexadecimal hash to put in your config.
Put this hash in the
detect_colorparameter. We used #19FFD9 to represent the color of green electrical tape.
- We used a segment size of 100 pixels, and a tolerance of 0.06, but you can tweak these later to fine tune your line follower.
What this will look like in the Config Builder:
Raw JSON:
{
  "register_models": [
    {
      "parameters": {
        "segment_size_px": 100,
        "hue_tolerance_pct": 0.06,
        "detect_color": "#19FFD9"
      },
      "type": "color_detector",
      "name": "green_detector"
    }
  ]
}
Configuring the visualizer
This step is optional, but if you’d like to see the bounding boxes that the color detector comes up with, you’ll need to configure a transform camera. This isn’t another piece of hardware, but rather a virtual “camera” that takes in the stream from the webcam we just configured and outputs a stream overlaid with bounding boxes representing the color detections.
In the CONFIG tab, make a new component with name show_detections, type camera and model transform.
Set the stream to "color" and set the source to "my_camera" or whatever you named your webcam.
You’ll need to edit the pipeline section as well with type set to "detections", and detector_name set to the name of your color detector ("green_detector" in our case).
You can paste the following into the Attributes section of the show_detections config builder:
{
  "stream": "color",
  "source": "my_camera",
  "pipeline": [
    {
      "type": "detections",
      "attributes": {
        "detector_name": "green_detector"
      }
    }
  ]
}
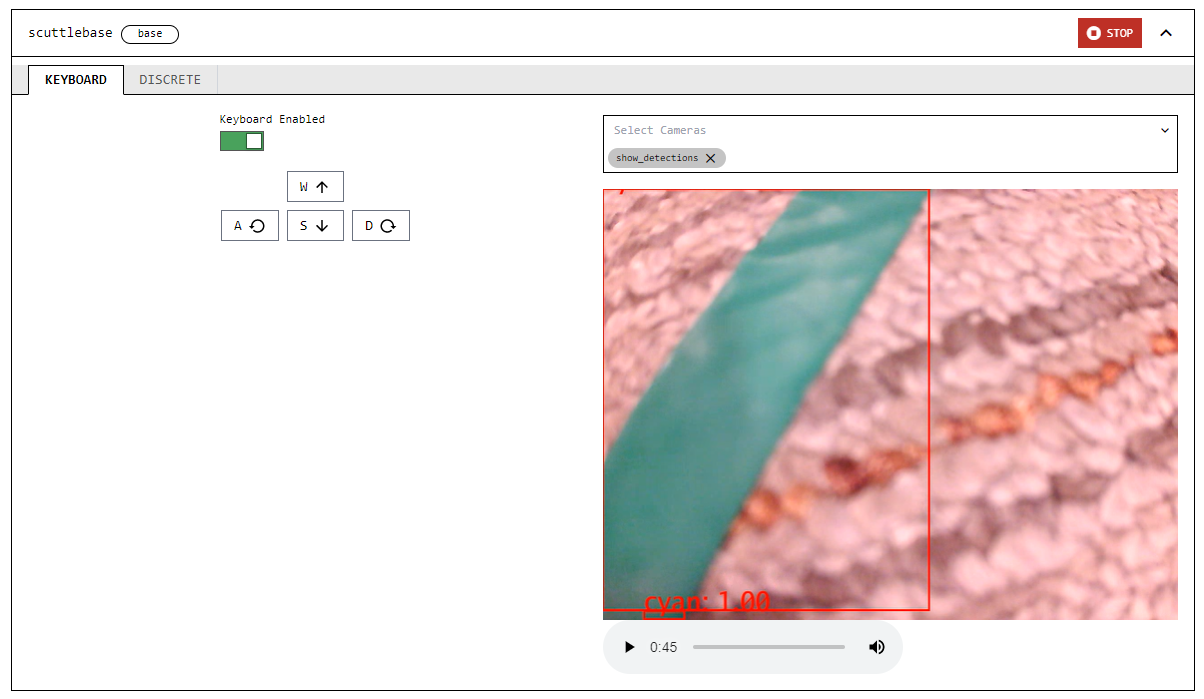
If you save the config and go to the CONTROL tab, you should now be able to view the camera feed with color detector overlays superimposed on the image.
Full example config
Below is an example JSON file that includes the board, base and camera components, and a vision service color detector. You may have different pin numbers and other attributes depending on your hardware setup.
How line following works
You position the rover so that its camera can see the colored line.
If the color of the line is detected in the top center of the camera frame, the rover will drive forward. When it doesn’t see the line color there, it will search for the color in the left side of the camera frame. If it detects the color there, it will turn to the left. If it doesn’t see the color there it’ll repeat the process on the right. Once the line is back in the center front of the camera frame, the rover continues forward.
When the rover no longer sees any of the line color anywhere in the front portion of the camera frame, it stops and the program ends.
Figure 2: A GIF of what the camera sees as the rover moves along a green line.
Let’s write some code
- Make sure you have Python installed.
You can double-check this by running:
python --versionor if you have multiple versions of Python installed, try
python3.9 --versionor
python3.8 --versionWe at Viam are running Python 3.9.2 (Python 3.8 is also supported) for this tutorial.
- Make sure you have the Viam Python SDK installed (click for instructions).
- Open a file in your favorite IDE and paste in the code from the earlier referenced repo.
- Adjust the components names to match the component names you created in your config file. In this case, the component names that you may need to change are scuttlebase, my_camera, and green_detector.
- From your robot’s page on the Viam app (https://app.viam.com), go to the CODE SAMPLE tab. Find the Python SDK field and copy the robot address (which will likely have the form robotName-main.1234abcd.local.viam.cloud:8080) and payload (a nonsensical string of numbers and letters) from it into the corresponding fields towards the top of your command file. This allows your code to connect to your robot.
- Save the code in a directory of your choice.
- To get the code onto the Pi you have a few options. If you intend to make lots of tweaks to the code over time it may be most convenient for you to set up a Mutagen Sync session from a directory on your computer to a directory on your Pi. If you’re just trying to get this running as quickly as possible, do the following:
- In your Pi terminal, navigate to the directory where you’d like to save your code. Run,nano rgb_follower.py(or replace rgb_follower with the your desired filename).
- Paste all your code into this file.
- Type CTRL + X to close the file. Type Y to confirm file modification, then press enter to finish.
Caution
Do not share your robot secret or robot address publicly. Sharing this information compromises your system security by allowing unauthorized access to your computer.References:
- Line Follower Code on GitHub: https://github.com/viam-labs/line-follower/blob/main/rgb_follower.py
- Mutagen Sync: https://mutagen.io/documentation/introduction/getting-started
Controlling your rover with Viam
- Go to your robot’s page on the Viam app (https://app.viam.com). Verify that it’s connected by refreshing the page and ensuring that Last Online (in the top banner) says, “Live.”
- Go to the CONTROL tab and try viewing the camera and also pressing buttons in the Base section to move your robot around. Ensure that the base moves as expected. If one or both drive motors are going backwards, you can power down the Pi by running `sudo poweroff`, unplug the battery, and switch the wires to the motor before powering it back on.
- Now for the creative part: Use your colored tape to make a path for your robot to follow. Perhaps a circle or other shape, or perhaps a path from one point of interest to another. Sharp corners will be more challenging for the robot to follow so consider creating more gentle curves.
- Set your robot on the line such that the line appears in the front of the camera’s view. Verify that the camera sees the line by viewing the camera feed on the CONTROL tab of the robot page.
- In a terminal window, SSH to your Pi by running:
ssh <your_username>@<your_pi’s_name>.localreplacing the angle brackets and the example text with your actual Pi username and the name of your Pi. Remember to delete the angle brackets!
- In this Pi terminal go ahead and run the code:
python ~/myCode/rgb_follower.pyBe sure to replace ~/myCode with the path to the directory where you saved your Python script, and rgb_follower.py with whatever you named your Python script file. You may need to call “python3.9” or “python3.8” instead of “python,” depending on how you configured your Pi.
Figure 3: Driving the base from the Viam app's CONTROL tab.
Figure 4: The camera view in the CONTROL tab on the robot page.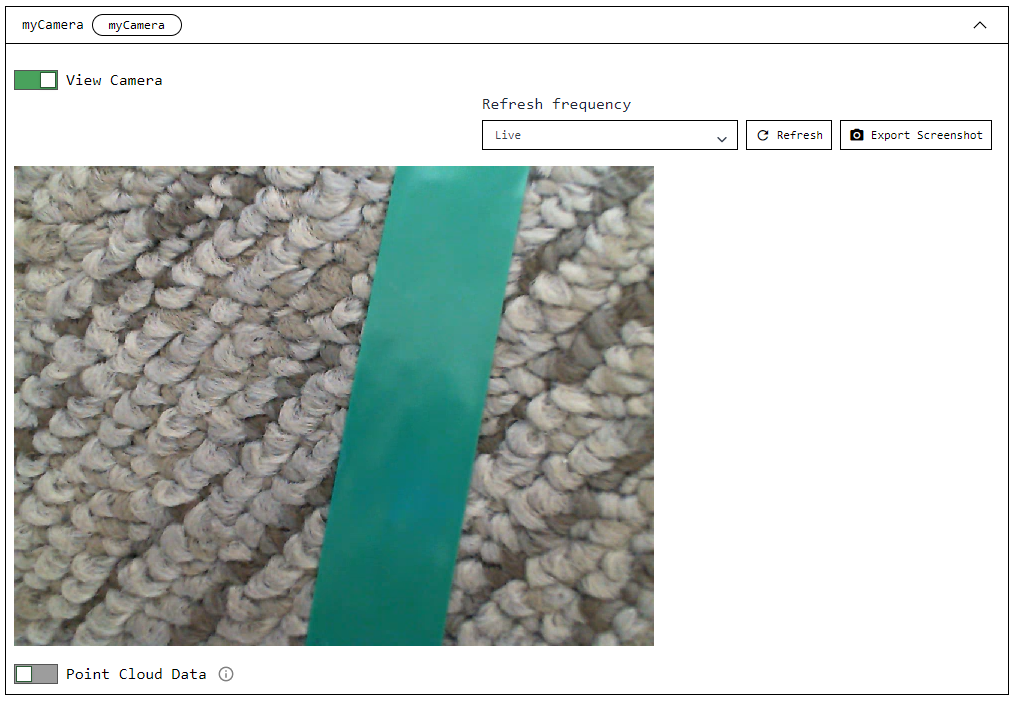
Summary
By now you have learned how to configure a wheeled base and camera with Viam. You have access to the CONTROL tab from which you can drive your rover around with WASD keys. You have learned to use the Viam vision service color detector, which can be useful in many other projects. You have a rover following a path of your choice, anywhere you want it to go!
Troubleshooting
Issue: The rover moves too fast to track the line
If your rover keeps driving off the line so fast that the color detector can’t keep up, you can try two things:
- Slow down the move straight and turning speeds of the rover by decreasing the values of
linear_powerandangular_power.- Conversely, if your rover is moving too slowly or stalling, increase the numbers (closer to 1.0 which represents full power).
Issue: The robot is not detecting the color accurately
Things to try:
- Add a
saturation_cutoff_pctand/or avalue_cutoff_percent(documented here) to your vision service parameters. - Try to achieve more consistent lighting on and around the line.
- Try a different color of line, or a different background.
Be sure to update your
detect_colorparameter accordingly.
Additional Troubleshooting
You can find additional assistance in the Troubleshooting section.
You can also ask questions on the Viam Community Slack and we will be happy to help.
Bonus Challenges
- Automatically detect what color line the robot is on and follow that.
- Use two differently colored lines that intersect and make the robot switch from one line to the other.
- Put two rovers on intersecting lines and write code to keep them from crashing into each other.
Viam Python SDK: https://github.com/viamrobotics/viam-python-sdk ↩︎
Line Follower GitHub repo: https://github.com/viam-labs/line-follower/ ↩︎
SCUTTLE Robot https://scuttlerobot.org/shop/ ↩︎
Color picker: https://colorpicker.me/ ↩︎